Installing Our Laminate Flooring – Our DIY House
This post may contain affiliate links · This blog generates income via ads
Learn how to install laminate flooring with this step-by-step tutorial and video. It’s a great DIY that can give your home a massive refresh!
This blog post was originally published in May 2013 and it talks about our house build and the installation of our laminate flooring. I’ve updated it today with a video tutorial, below. We still LOVE our laminate flooring over 5 years later, and I’d definitely recommend laminate and this particular brand to anyone that’s looking!
Watch my video to see how we install laminate flooring and to get a peek at another room we’re renovating in our home this year:
We’ve just survived a really intense, really successful week of work on Our DIY House. Our biggest accomplishment this week? Finishing the installation of our gorgeous laminate flooring!
I can’t say enough good things about our floor. It’s amazing how flooring instantly turns a construction zone into a home, and this laminate flooring has done just that.
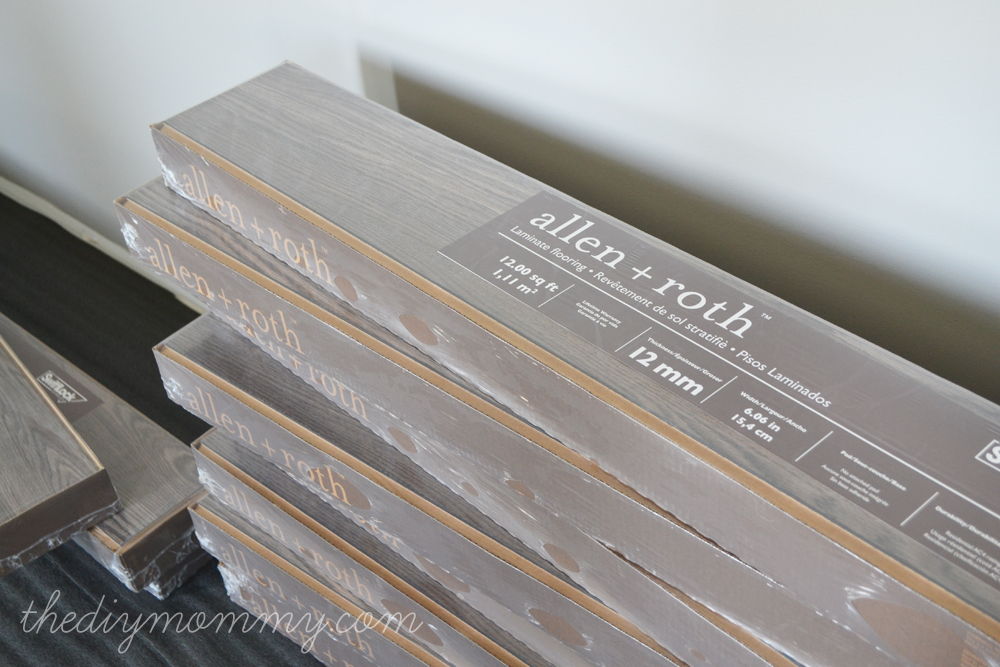
Lowe’s Canada was generous enough to partner with me on our flooring project, and we chose to install a beautiful, high-quality laminate from made by Allen + Roth called Provence Oak.
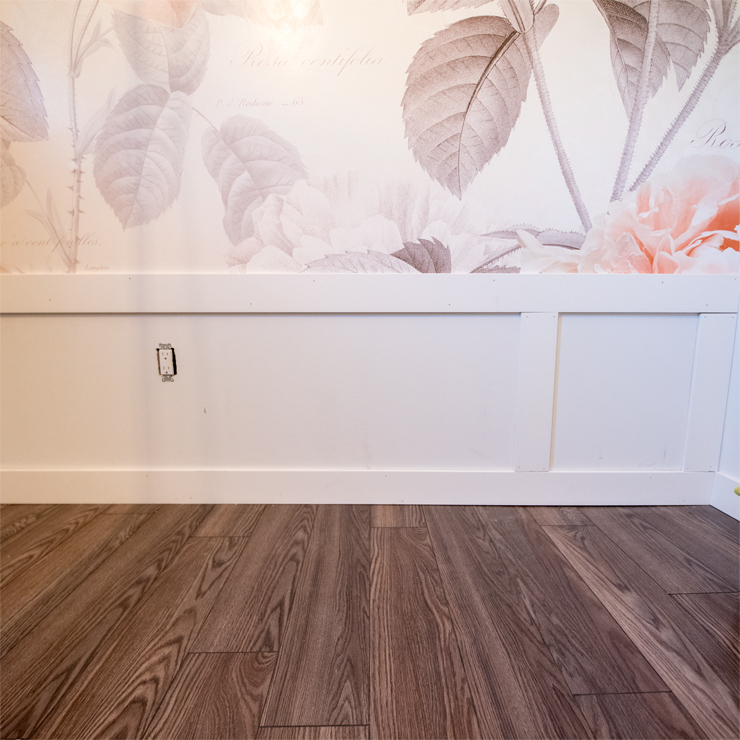
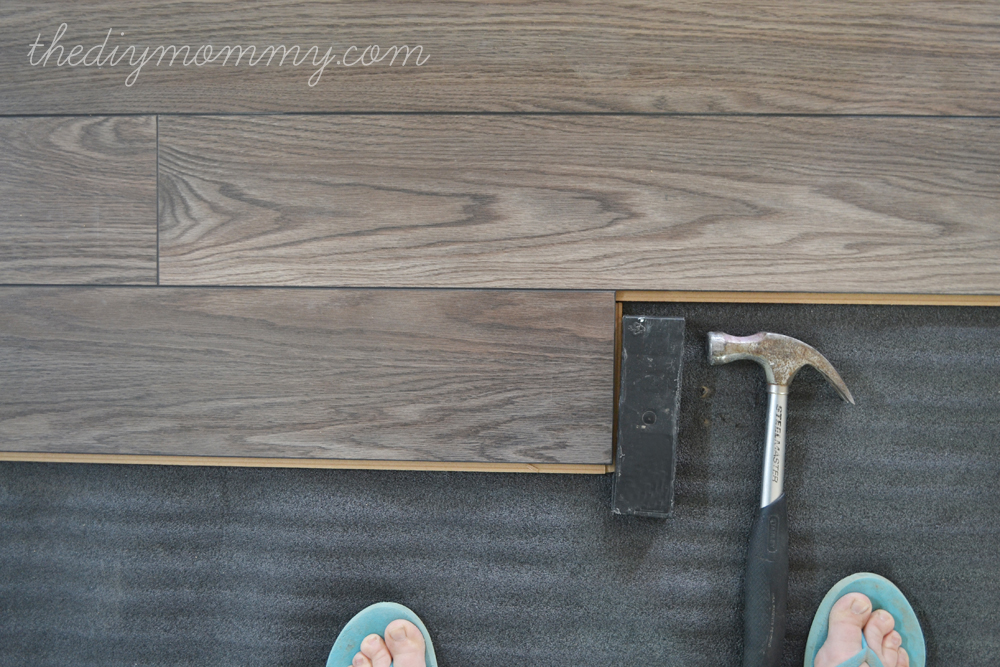
What I like about Allen + Roth, is that their products are really on trend but they don’t break the bank. For example: my delicious laminate flooring. It’s smokey grey-brown in tone with a ton of rustic texture. The planks are nice and wide, and they’re textured to match the wood pattern on them. One of my favourite features of this laminate are the grey-black beveled edges that define each piece. The wood looks slightly weathered, but in a good, stately old French estate sort of way.
Just look at that texture (and Little C’s chocolate ice cream beard)!
Why did we choose laminate flooring?
I didn’t want anything else. Really! In my opinion, laminate floors are the best choice for family homes with young kids and/or pets. Laminate is very resistant to scratches and scuffs. It’s really simple to install yourself (I’m not joking!) and great if you’re on a tight budget like we are.
We installed all 2000 square feet of our Allen + Roth Provence Oak laminate flooring from Lowe’s in about 5 full days. These days were broken up in several chunks of a few hours at a time. The team was varied – me, my hubby, my dad, my brother and a couple of friends all pitched in.
Here’s how we installed our laminate floors:
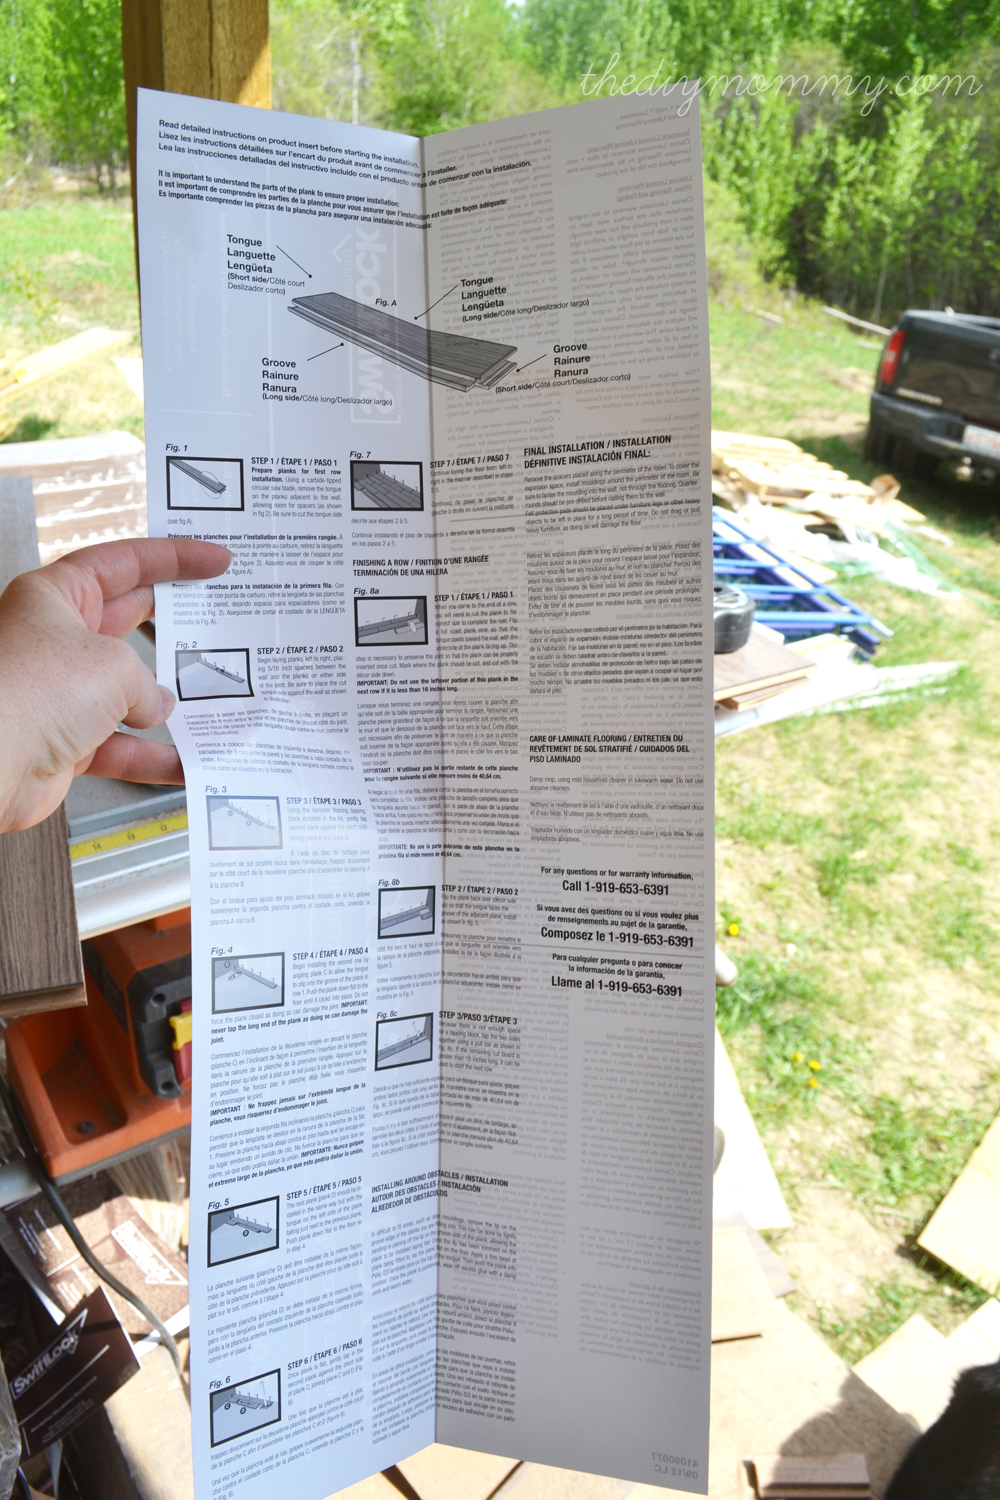
The flooring came with very detailed instructions and pictures, PLUS a number to call for help. It was fool proof!
We made sure to stack our boxes of laminate on the opposite ends of the rooms we were starting on so that we could work towards them.
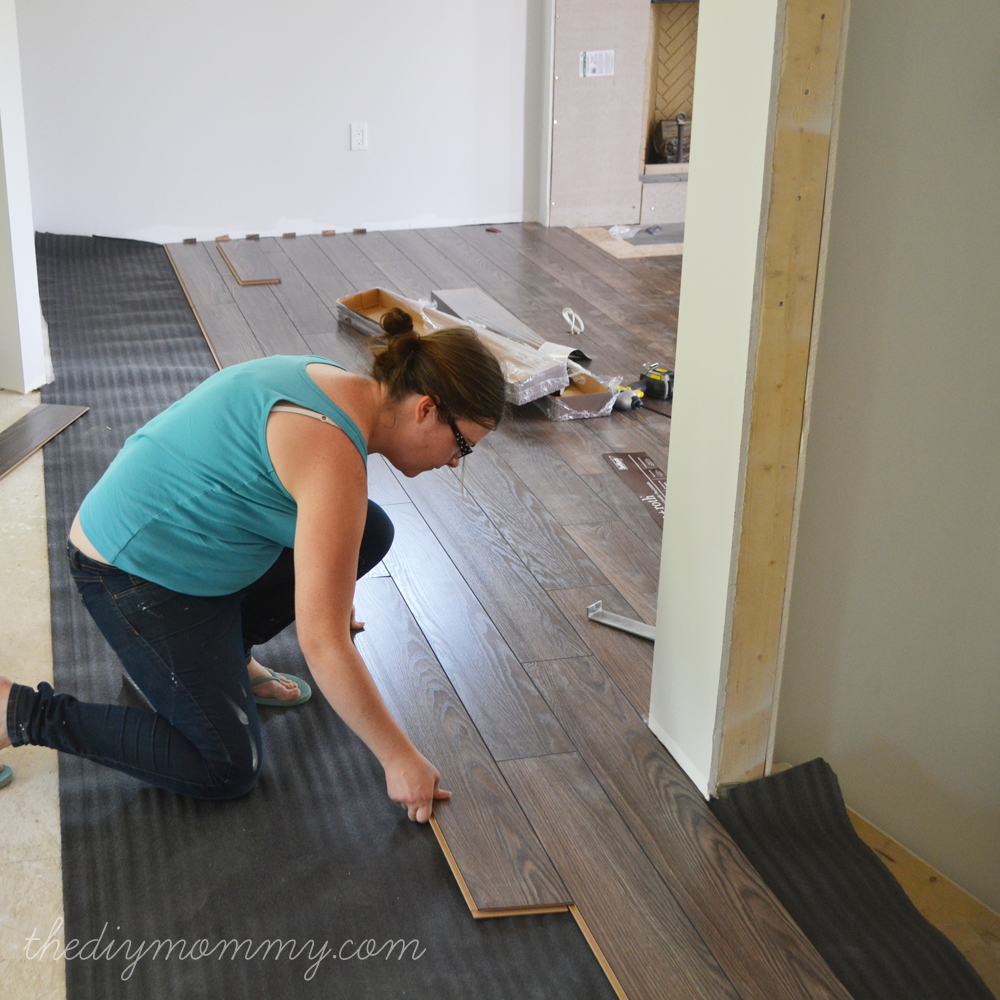
This flooring doesn’t need an underlay, but we decided to use an inexpensive foam underlay just to hide any small dips and inconsistencies in our sub-floor. We simply laid the underlay down first and let it float (we didn’t use any tape or staples).
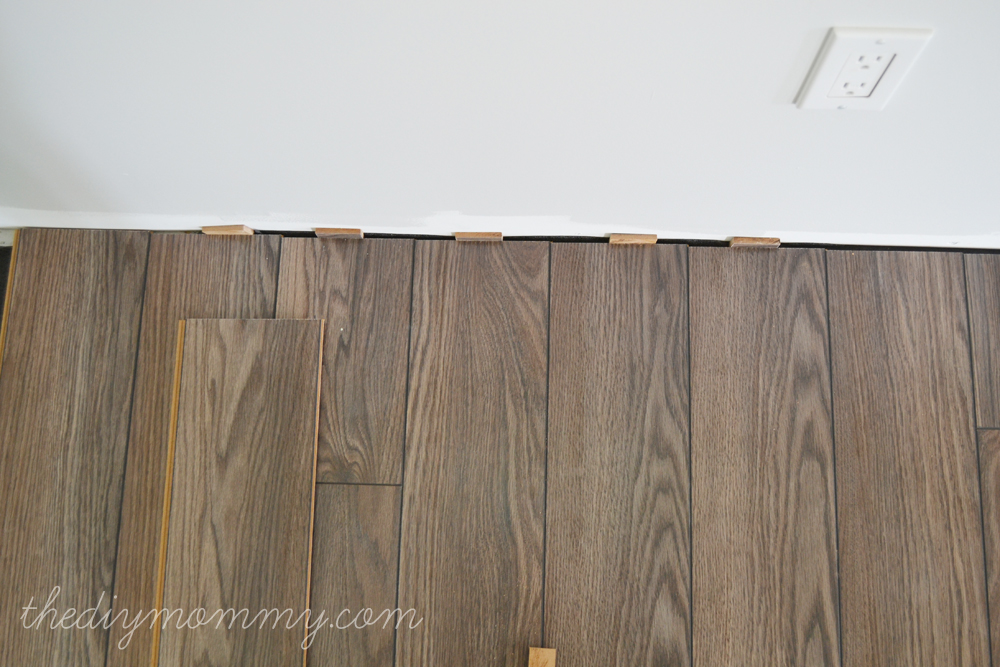
We left a bit of space at the start and sides of our rows as the instructions suggested. This helps cushion any shifting the floors may make later on down the road. You can buy spaces made for this, or we cut small pieces of laminate to use as DIY spacers.
We decided to stagger our planks randomly (which actually isn’t random at all because you have to watch for any repeating lengths or wood patterns). We simply cut planks into different lengths to start the rows with to make the staggered effect. (I used my new friend, the circular saw.)
Once the first row is done, we started the second. These boards click in really easily – the long side clicks in first. You simply lift it slightly and push it into the row before.
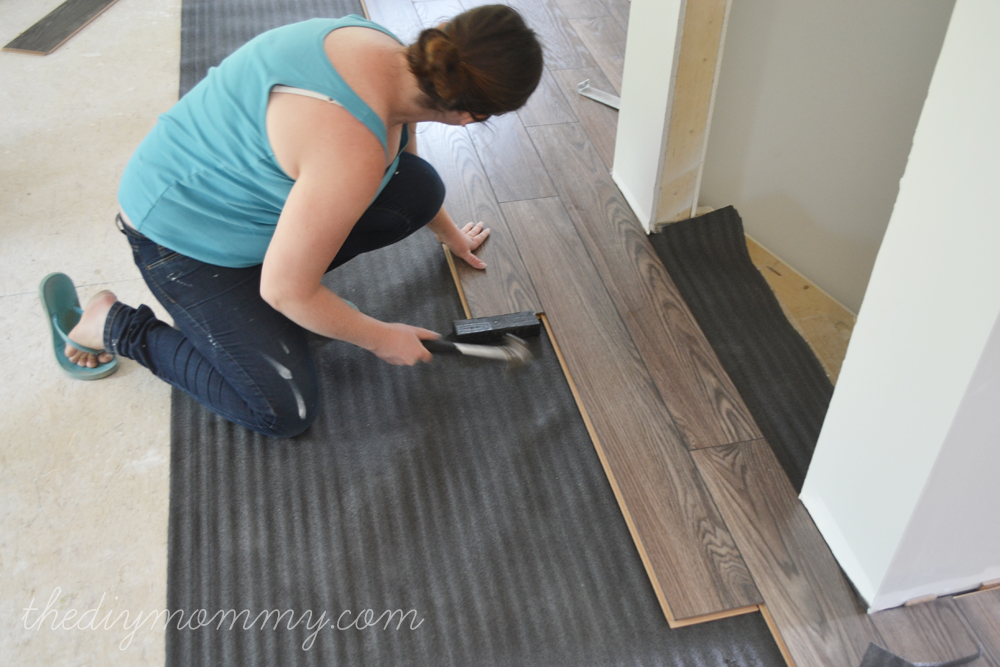
Then, it’s the short join’s turn. Using a hammer and a plastic block made especially for this purpose (it has a groove in it to prevent wrecking the tongue of the laminate), we hammered the laminate into the previous piece of the row.
We made sure every join was nice and snug. We currently have laminate flooring in our garage house and it’s worn really well except for the joins that weren’t hammered in properly.
We continued on like this, cutting the boards as needed to fit around closets and doors.
We used a circular saw, a table saw, and a really helpful hand-held Japanese saw to do the smaller notches.
One person can install laminate (and we did at times), but we found it went fastest with a team of two. One person can lay the laminate while the other cuts, or you can have two rows going at the same time.
We managed to have NO transitions or joins from room to room, which is miraculous considering our layout. Upstairs, we had to start in two separate rooms and hope the laminate met up in the same spot at the stairs. It did! That another bonus of laminate – each piece is perfect and square.
Hubby was pretty proud of himself as we reached the finish line (and aren’t you jealous of his Hulk pants I DIY’d for him last Christmas?).
The smoky grey tones of our laminate look beautiful with our turquoise and grey paint colours.
We can’t wait to get into our home and play, dream and LIVE on these floors. I am overjoyed with the finished product… and I’m more excited than ever for us to move in!
Next up is our kitchen, doors, tiling and trim. The list is getting shorter.
What do you think of our laminate floors? What type of flooring do you have in your home – do you love it?
(Disclosure: This post is sponsored by Lowe’s Canada. The views and opinions expressed here are purely my own. Thank you, Lowe’s, for making my flooring dreams a reality. In fact, the reality is better than my dream!)
This post is part of my “Our DIY House” series where I’ll share with you my most exciting DIY ever – building a country house from the foundation up with my talented hubby! We’re crazy, we’re creative, we’re on a limited budget and we’re planning on having it finished in the Spring of 2013.










The floors look fantastic. The house we bought is a combination of hardwoods and carpet.
Thanks, Sheri! I’m so happy with how they turned out. I can’t wait to move in and walk all over them! 😉
Gorgeous!!!! Love the color and look of them with the paint. Looking forward to see more updates 🙂
Actually its funny, I used to think that I love hardwood (we currently have hardwood in out house). But it really gets a beating with a dog and the kids. If I could choose I think I’d pick a beautiful laminate. Seems like there are way more choices out there now too!
Thanks, Lena! It’s true – we installed laminate 7 years ago and the laminate out today is FAR nicer in look and quality!
They have turned out really well..they look lovely and nice pics too.
Thanks so much, Alice!
LOVE the flooring!!
I found Awesome company who serve Flooring they offer best service and provide all types of flooring http://efloorsusa.com
These look beautiful! I came across your page when looking to see if I can put in my own laminate flooring. It’s my first home and I don’t want to get overwhelmed! Hmmmm…this might give me courage. Thank you!
Thanks, Jenny! It was time consuming, but it wasn’t very hard at all. If you give yourself a lot of time and have someone helping you, I’m sure you could do it. Good luck!
Very easy installation is laminate flooring Krono Original.
http://krono.mega-parket.sk
Very helpful. Thank you. I’m considering the same flooring for my project. Several friends have cautioned against getting a dark laminate. Now that you’ve lived with yours a few months, how are you liking it? Is it holding up well? Any buckling or scratches? Do you find that it shows dirt or needs frequent cleaning?
Hi, Lizzie! I still honestly love our laminate flooring, and everyone always comments on how nice it looks. I do notice that it shows dust a lot more than my old laminate (which was a medium honey oak), but it’s still better than some of the dark, shiny hardwood that some of my friends have. The texture and colour variations in this laminate definitely help it not look so dirty. I hope that helps you!
We’ve been planning doing our floors, and I wanted a laminate in a greyish oak. I saw this product on sale in this week’s Lowes flyer, but the pic as well as what’s on their website is of just a tiny sample. So I decided to google it, and found your site!
I love how your turned out, and can’t wait to get started on ours.
Thanks for the inspiration!
I was just curious, how do you stagger the boards? I know that probably sounds dumb but this is our first time and I love the way yours looks and want to get it right!
Hi Christy! We just cut them randomly. Often, we’d use the cut-off from the previous row to start the next row. I prefer the random staggered look to one that is more calculated!
Hi!, I was curious what is the model number of that flooring? Its very nice and I think its similar to L3080 armstrong.
Thanks so much
Jeff
Hi, Jeff! It’s Provence Oak by Allen + Roth from Lowe’s. We love it!
We just purchased some Allen + Roth flooring and are thinking of laying down an extra underlay as well. Did that present any problems for you during install or after? Thanks
I love the look of the floors, and am looking at doing something quite similar in our house. My questions are: did you use the laminate in the bathrooms as well? Have you experienced any water damage from it? Why did you end up going with the laminate over vinyl planks?
Hi Alyx,
No, we actually laid tile in the bathrooms just in case! With young kids, we were certain that we’d have some accidents in there. 🙂 No, we haven’t experienced any water damage yet and we’ve lived on them for over a year. I use little water when I mop, and I always try to clean up spills ASAP. As far as vinyl planks go, laminate looks a little more like hardwood in my opinion. I love ours so far!
Hi:
You mentioned in your post you still had your kitchen to do. Was wondering if you laid the laminate flooring in there too and if so, how is it holding up? We are planning to lay 1200 sq. ft of an Allen + Roth flooring through our great room and kitchen as it all flows together. I don’t want to try and blend another type of flooring into the Rustic Oak planks we are going with and am hoping this product stands up well in the kitchen.
Thanks,
Karen
Hi, Karen! Yes, we laid the laminate in our kitchen and I’m very happy with it. It all looks as good as new except for one small spot where I left our mop and it leaked for several hours on the floor. 🙁 Otherwise, it’s fantastic!
Hi I saw the pictures you posted on the Lowe’s website, I am dying to know….where did you get your curtains?!?! I absolutely LOVE them!!!!!!!!!
Hi, Staci! Which curtains? If you’re talking about my kitchen drapes (turquoise floral ones), I made them. 🙂 Here’s the tutorial: https://thediymommy.com/sew-diy-grommet-topped-drapes-tutorial/
I have a carpeted 15×13 family room with a small cut out around the fireplace that buts up to a previously laid laminate floor in the kitchen. I’m puling up the carpet myself to save money. I want to attempt to lay laminate flooring in that room myself. First, how do I go about marrying up the 2 floors without a threshold bar/bump/lip? The floors will be different materials & colors. Second, do I have to remove all the trim/molding first before laying the floor or can I fit the flooring right underneath the wall trim? Thanks
Hi, Mary Ann! I don’t think there’s really any way to butt the two different floorings up together nicely without some sort of transition strip. You can get nice rounded ones from home improvement stores like Lowe’s that are easy to walk over. Yes, you should definitely remove your baseboards before laying down laminate and then nail them back up again after you’ve finished. Hope that helps!
I love it! So much, that I went to Lowes to only realize they don’t offer that color here in Washington state 🙁
Thanks Lena! You make it sound easy and I hope it is. Getting ready to put down Allen & Roth Kettle Pine in our home. Thanks for posting the blog and photos!
Hi…i really like this laminate and i would like to know if it is made of MDF or HDF…thx for your help
I’m not entirely sure, but here is the product link if you need more info: http://www.lowes.ca/laminate/allen-roth-6-in-w-x-47-12-in-l-provence-oak-laminate-flooring_g1357373.html?isku=9701396&linkloc=cataLogProductItemsImage#
Hi! I know it has been a while that you have installed it. How is it holding up(scraches, chips, wrapping becuase of water etc)? I am planning to finish my basement and I like this color. Would you recommend?
thanks
Did you install this over carpet? we hate our carpet in our rental and want to install laminate floors.
Carpet in rentals can be hard to deal with. It is installed over a underlay so not a carpet. The laminate would not hold together over carpet.
Hi, I didn’t see where I can comment so I replied to your message. I wanted to know i I could place these planks over what appears to be already laminated floors, just tatted up? Also, how did you cut the planks for areas that only needed a little piece of the plank? I don’t have tools, so will I need to get those pieces cut after I have laid down most of my planks for each room? Of course, I will be doing this by myself since I don’t have help like you did but you said it can be possible. How much did something like this cost for you? Did you know in ahead of time how many boxes of planks you needed? Beside the hammer, can you name the other tools that were needed and what is the name of the cloth you placed down before the planks? I am sorry to ask but I really want to do this because my floor looks horrible and I cannot afford a $15,000 job.
Hello Amelia,
You most definitely can tackle a project if you put your mind to it 🙂 Good for you for wanting to take on your own flooring. As you have a lot of questions, we would recommend that you talk to a professional company or someone at your local hardware store that can show you exactly what you need and answers your questions specifically to you.
Best of luck!
How is the flooring holding up? We’re thinking about using this product in our “english basement.”
It’s been great so far ?
Hey Christina Thanks for such great content, My husband and I have been thinking about lamenting the floors in our new home for a while now. This certainly convinced me as I have 2 young kids. thanks
You will love it!
Some useful tips you have shared above. Thanks I’ve learned something new by reading this.
Construction needs to be good so get good materials for your building to assure good product and outcome.
Couldn’t agree more
Thanks so much for this post, am wondering if this laminate is made of HDF or MDF though.. I’ve been discussing lately with my wife about laminating the floors.
Thanks so much for this post, am wondering if this laminate is made of HDF or MDF though.. I’ve been discussing lately with my wife about laminating the floors
Hey Christina Thanks for such informative article. I really loved reading every word. My wife and I have been thinking about lamenting the floors in our new home for a while now. This certainly convinced me as I have 3 young kids.
That’s so awesome! Thanks for stopping by
Love this guide! Its so important for people to know how to properly install laminate and manage flooring projects for their own house!
Thanks, Billy
it might be time for me to change up the floors I walk on in order to invest in healthier living environments which create fewer trips to the doctors fighting those triggers that could have been avoided! Living with asthma and allergies can be manageable you just have to know what elements you are battling before you can walk all over them! (lol)
These tips are useful and effective, thanks for sharing!
I love this article it’s very helpful for me keep it up and thanks for share such kind of nice information with us.
Hi, when I am searching on Google about floor then I am reached on your article. Really nice information, I would like to share this because it’s very helpful for me. Keep it up and please don’t stop posting.
These are some great tips for installing laminate flooring! And you’ve definitely got it right; flooring makes a massive difference. Choosing the right wood can be pretty tricky, but this guide made it a lot simpler! Thank you so much for writing, this was really helpful!
That’s good tip for house
Hello Christina,
Thank you for this useful DIY tips. I’m thinking of trying this technique soon. Do you have a pinterest account so that I get updates when you post a new pin?
Waiting for your response
Hi! She’s The DIY Mommy over there as well 🙂 https://www.pinterest.ca/thediymommy/
Hi! We just layed this flooring and are short 1 box. Unfortunately the product is discontinued and neither Lowes or the manufacturer has any. Do you have any extra that you would be willing to part with? Not sure where you’re located but I would be willing to pay for shipping. Thanks!
Hello, I like your post. very nice tip how to lay laminate floor. your videos are very helpful as well. even for me work as handyman in sydney. I do different kind of flooring, carpet and concrete polishing. if you need any information I am happy to help. http://www.mrbudget.com.au
Thanks for sharing these tips. I found these tips very helpful. I believe that every mother like me who is reading this article now is truly happy about this very informative article.
Excellent post. Thanks for writing and sharing this post with us.
Well, this is an awesome post and written very well. Your point of view is very good.