DIY Roller Shade | How To Make No-Sew Black out Blinds
This post may contain affiliate links · This blog generates income via ads
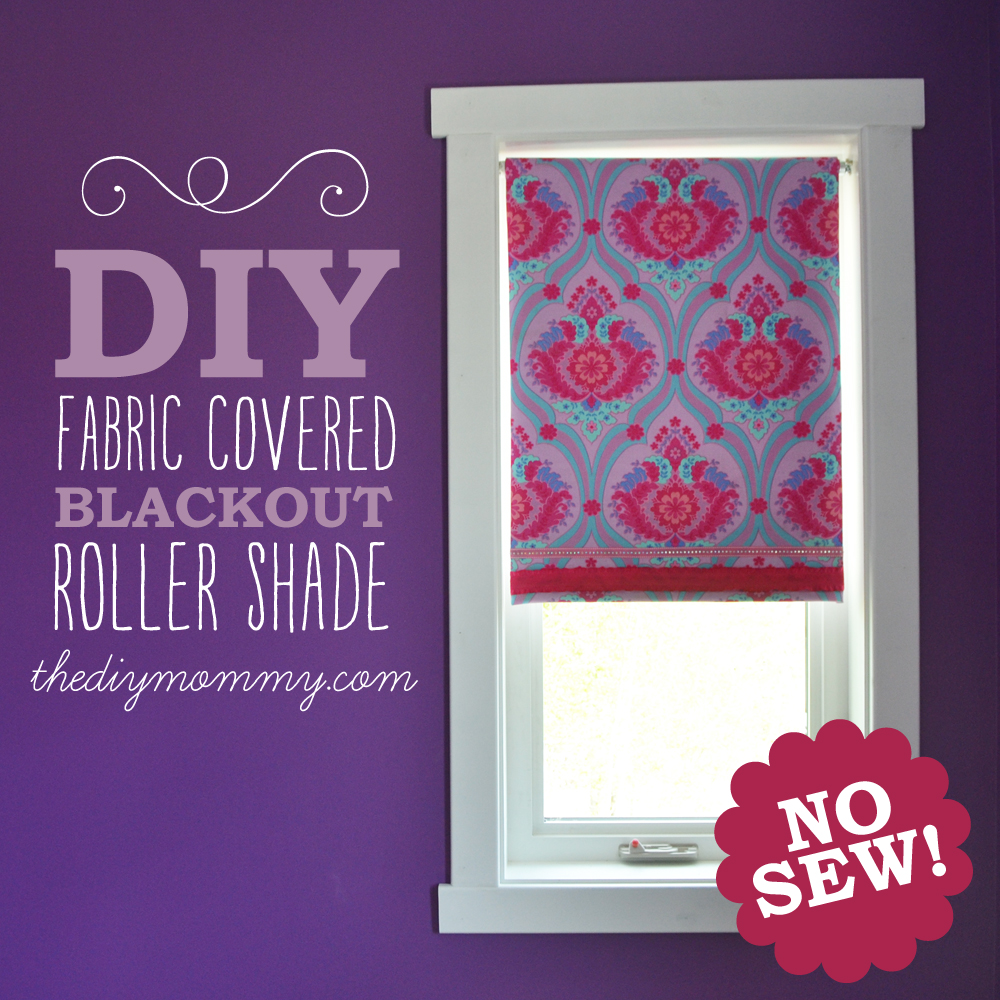
Window treatments can be so expensive, but they don’t have to be! I’ve figured out a way to use cheap vinyl roller shades to create custom size fabric DIY roller blinds, and I cannot wait to show you how I did it! This is a simple no-sew DIY project that anyone can do. Put away your sewing machine and get ready to make your own DIY fabric roller shade!
This post was originally published in 2013 and has since been updated!
Sleep is incredibly important to me. My children sleeping all through the night is also essential to me. This is why I immediately started working on blackout blinds for my girls’ bedrooms in Our DIY House after we installed our window casing (Did you see my DIY craftsman trim?).
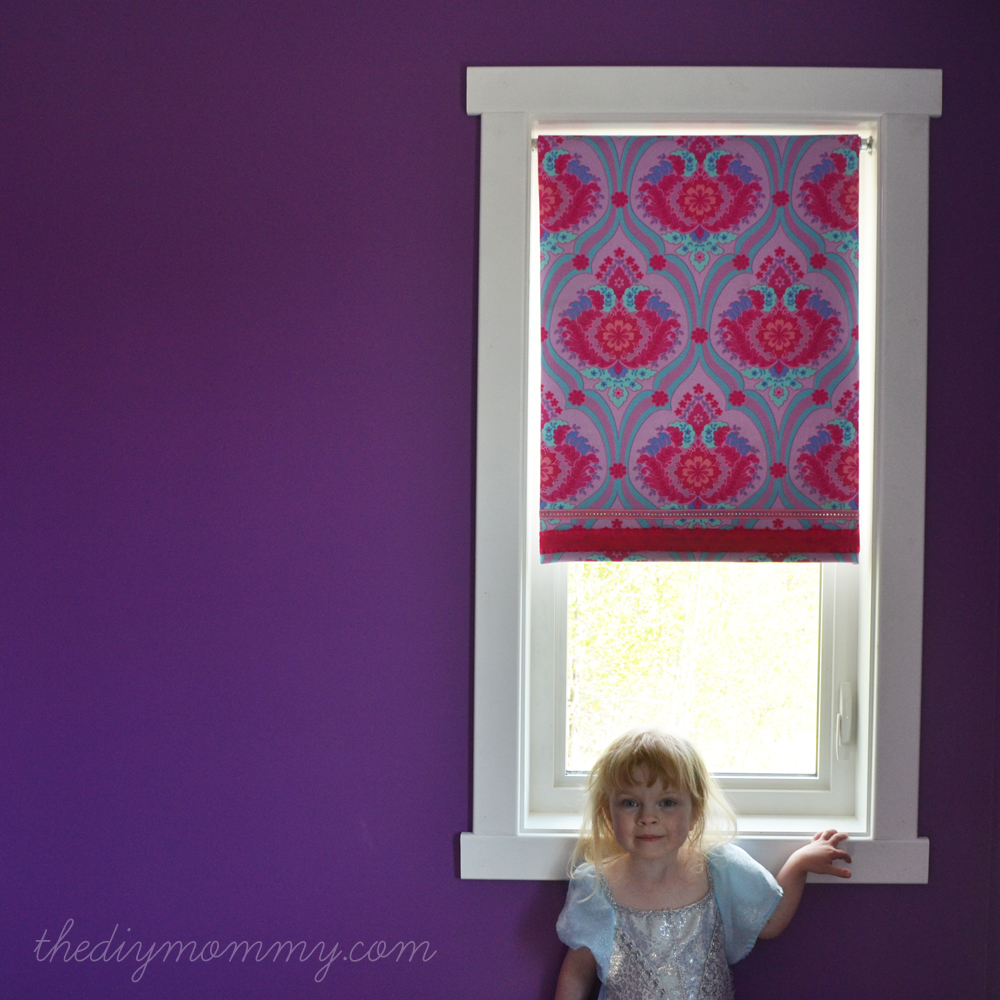
Little C’s room was first on my DIY list because we already had all of her new room’s fabric. (See Little C’s bedroom mood board and projects here). I had seen several tutorials, blog posts, and YouTube videos on how to make no-sew fabric covered roller blinds. So, I wanted to try to make some for Little C’s windows.
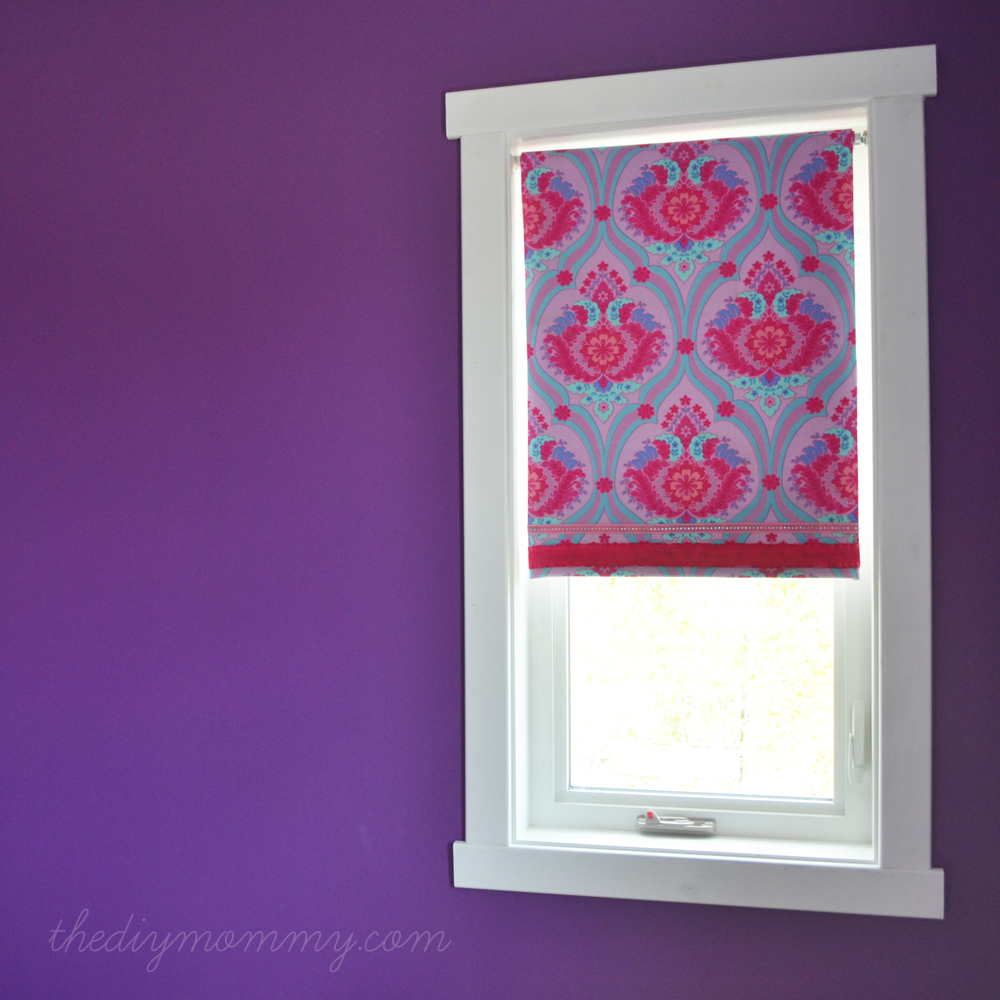
I wanted the blinds in her room to fit inside the windows with an inside mount so that they wouldn’t be in front of the casing I worked so hard on. However, if your goal is to block every last bit of sun out of the room, I recommend hanging the blind over your entire window frame with an outside mount. This way, the blind will meet the wall on the side of the window and give you a true blackout blind. My kids can sleep with a little bit of sunlight peeking through. So I went with inside-mounted shades to get the aesthetic look I wanted. There’s no actual “right way” to do this, it’s all about personal preference.
How do you add blackout fabric to roller shades?
I wanted a no-sew solution to this question! This is not just because I wanted these to be as easy as possible, although that was a definite perk. What I really didn’t want were needle holes poking through the vinyl on the blinds, which would be pretty unavoidable if I sewed them. These would be visible when the sun was shining and would make my blind look far less than professional. So what could I do instead?
I looked around and found tutorials on how to glue fabric on to achieve this custom look. But, I was skeptical about using spray adhesive to stick fabric to roller shades. It seemed like my best no-sew option though, so I decided to give it a try. Would the shades still roll the way they should? Would the fabric lay flat?
I’m happy to say that the answer to both of these questions is a resounding “yes”! And, I also had a happy little girl who thought her window shades were “the beautifulest”. There really isn’t higher praise than that! So, I am here to say that using adhesive spray to attach fabric to your new roller blinds really is the way to go.
How do you make homemade blackout shades?
So, how do you actually make these blinds? Simple: I’m giving you a materials list and full instructions so you can do this yourself! It really isn’t that difficult. Let’s begin!
Materials to make a DIY Roller Shade
- Vinyl blackout roller blind
- Fabric (enough to reach from the top of your window to the bottom + about 3″) – use nothing heavier than cotton quilting fabric
- Ribbon (optional, for embellishment)
- Spray adhesive
- Tube of fabric glue
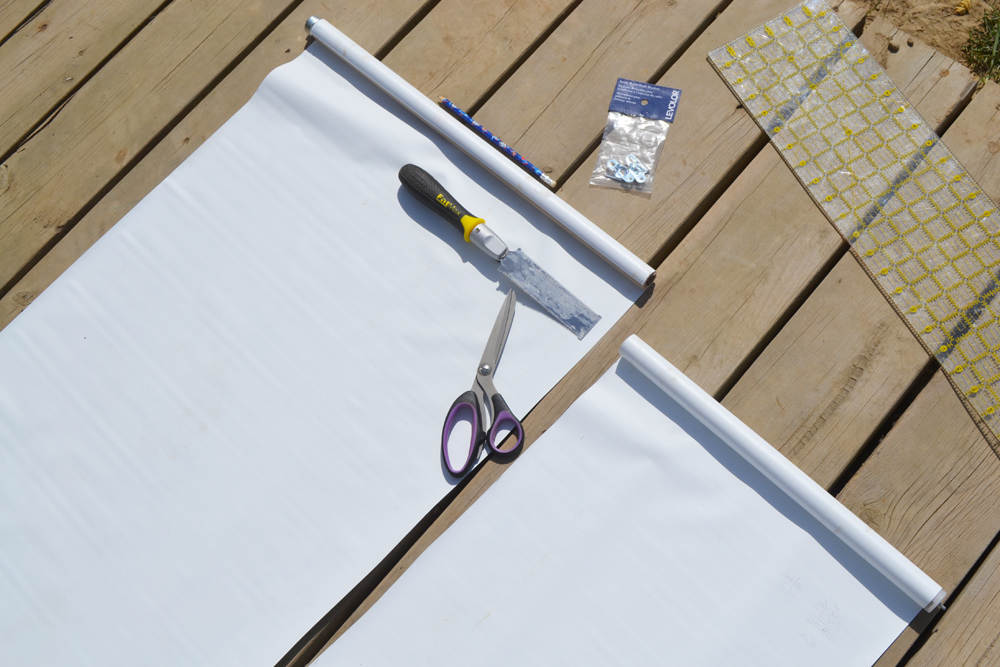
- Fabric scissors
- Ruler
- Small saw
- Mounting brackets, screws, screwdriver
JUMP TO THE PRINTABLE INSTRUCTIONS
An important note regarding fabric options: do not use anything heavier than cotton quilting fabric! If you do, it won’t lay flat and the blind definitely won’t roll up the way it should. It can be tempting to forget that weight matters when browsing all the fabric rolls at your favourite fabric store, but just remember to stick with something thin and light. I recommend using just enough fabric to reach from the top of your window to the bottom with a few inches to spare. In my opinion, there’s no need to cover the entire roll of vinyl. Plus, it makes the shade heavier and more cumbersome.
Buy blackout roller blinds from a home improvement store that you can cut to fit your windows. Home Depot is a great place to check first! There are also online options. Since you are going to be covering the vinyl with your own choice of fabric, you don’t need to worry too much about how it looks. Getting the best price for a decent quality product is really the goal here.
Should the roller shade roll front or back?
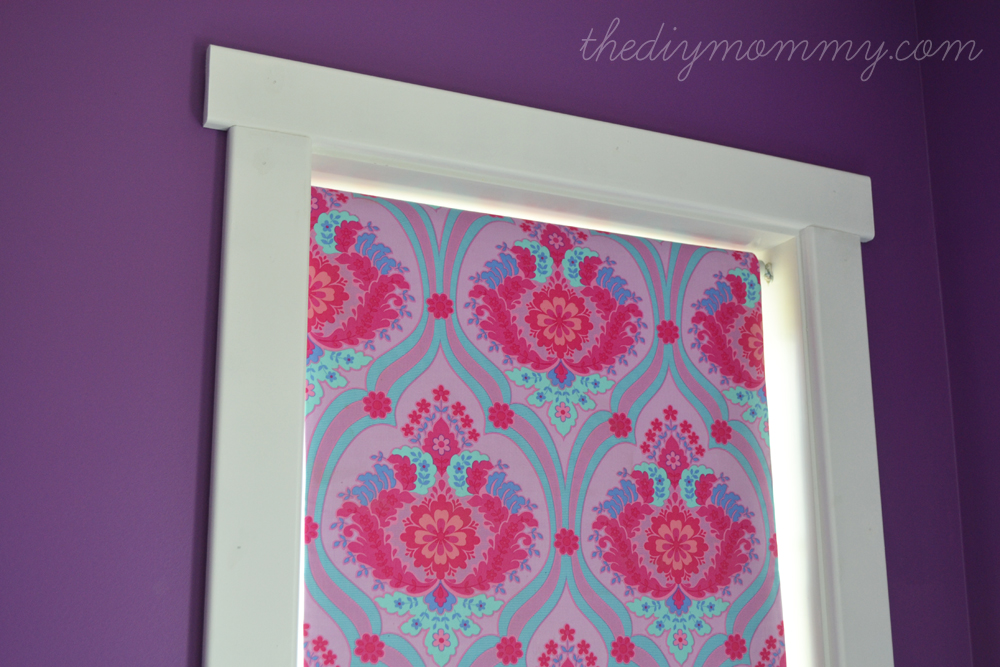
Just a quick note about whether or not to have your roller shade roll up from the front or back of the shade. If the ultimate purpose of these blinds is to block light, I would recommend having your DIY roller shade roll from the front, especially if you decide on an inside mount. This is because the blinds will cover more of the edges of the window if they roll down this way than if they have a reverse wind. If you decide to do an outside mount instead, this doesn’t matter quite so much. But it is best to plan which you will do before you take your measurements and decide how wide you want your blind to be!
Measure the width of the window
Measure the width of your window with a measuring tape, using either the inside measurements if you are doing an inside mount, or the outside measurements if you’re mounting your blind on the outside of your casings. Put a mark on the vinyl at your desired length for cutting.
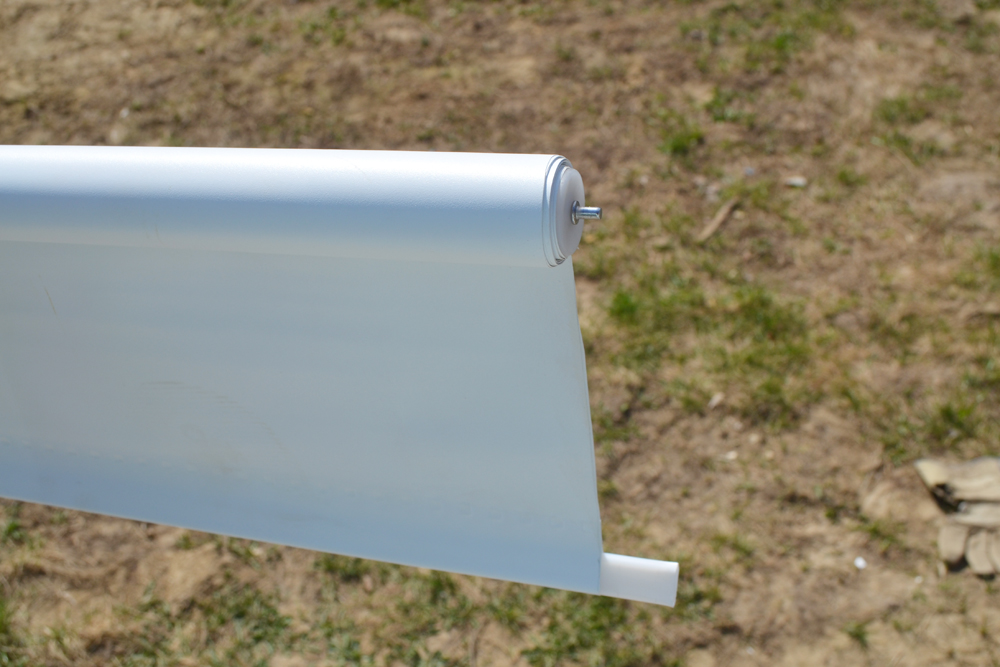
Then cut the blinds to fit the measurements for the size of the window. I used fabric scissors on the vinyl (you should just be able to glide them along in a straight line without cutting too vigorously) and a Japanese saw to cut the thick cardboard tube. There’s a little end plug that you’ll have to pop off the cut end of your roller shade and then pop back on the new end. I used my scissors to pry it of and banged it on the floor to get it back on securely. DIY is not always graceful!
Test your Adhesive
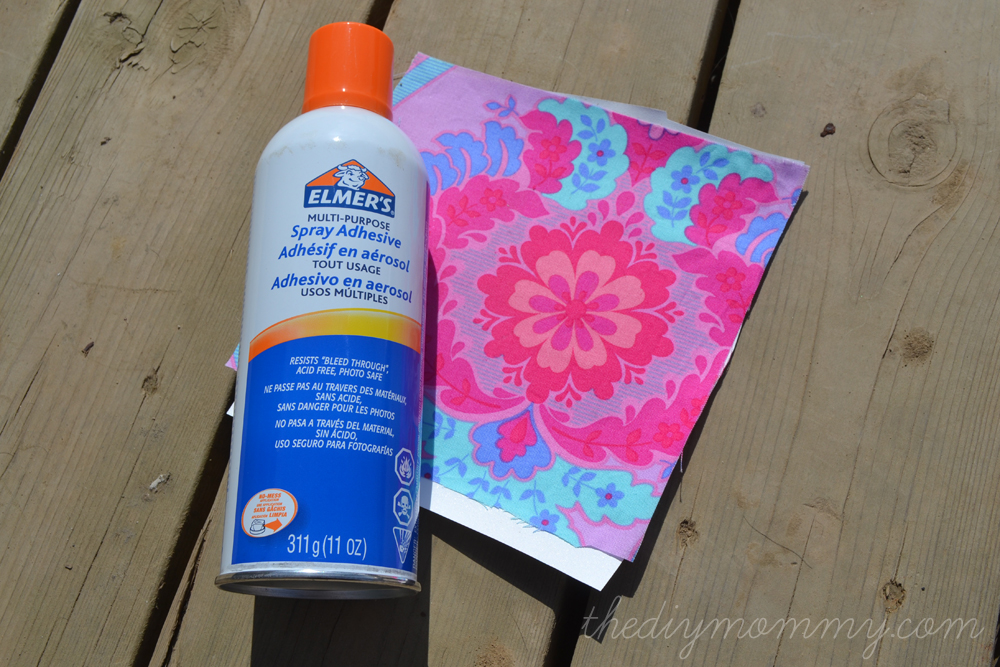
You’ll want to test your adhesive first. I used Elmer’s Multi Purpose Spray Adhesive. Take a piece of the excess vinyl you just cut off, spray it with your adhesive product according to the directions, and apply a scrap piece of extra fabric of the same weight as the one you are using for the blind. Let it dry and then check to see if it bonded properly. When I did this test I was happy to see that my combination of adhesive, blind, and quilter’s cotton worked well, so I could go ahead and attach the fabric to my blind.
Lay Out the Fabric
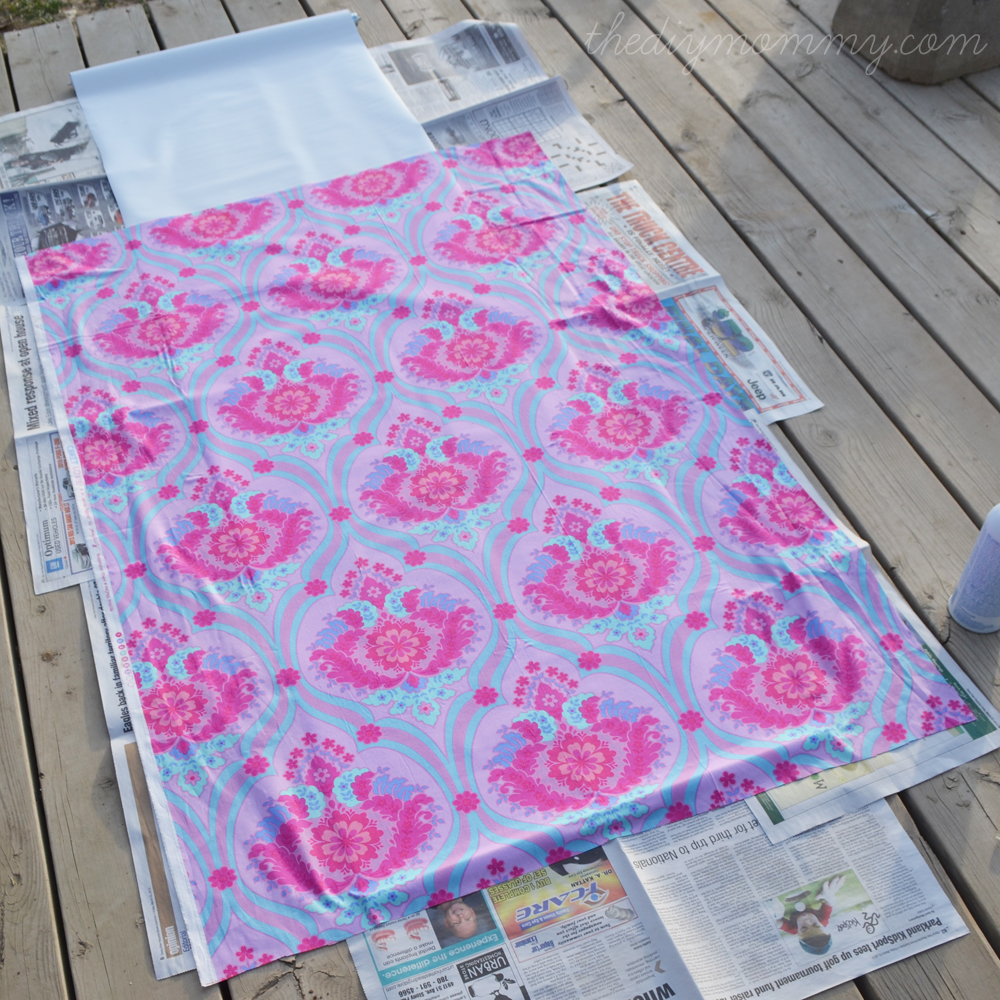
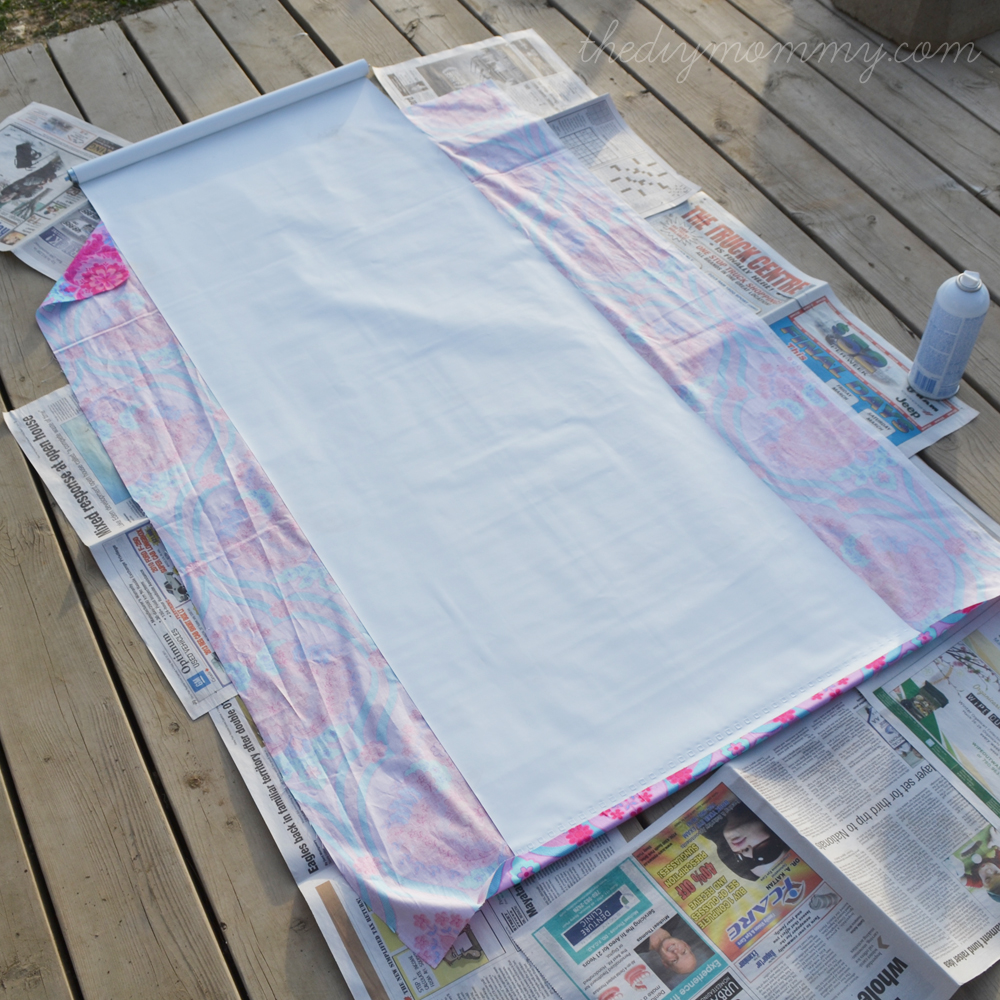
Unroll the vinyl shade once your adhesive test is complete and you’re happy with your results. Lay your fabric over it, making sure that it’s centered properly if it is a patterned fabric like mine. Make sure that it’s hanging over the bottom of the shade about 1″.
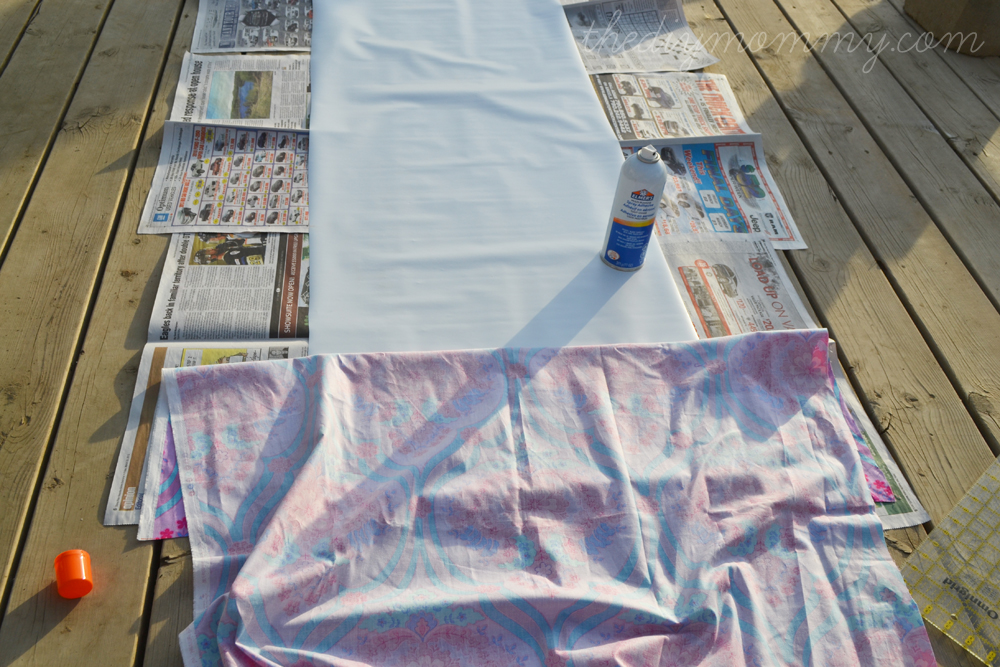
Lift up the bottom 6″ of the fabric, spray the blind underneath it thoroughly, and then smooth that bit of fabric over the glue with your hands. I tried a ruler at first to smooth the fabric, but doing it by hand seemed to work much better. Now, flip down the top edge of the fabric and spray the next 6″ of the blind, and smooth the fabric over it. Repeat this until you’ve fixed the full length of fabric to the entire shade.
Once the glue has dried, flip the blind over and spray the piece of fabric hanging down past the bottom edge of the blind. Turn it over the bottom edge and press down on it to stick it firmly in place.
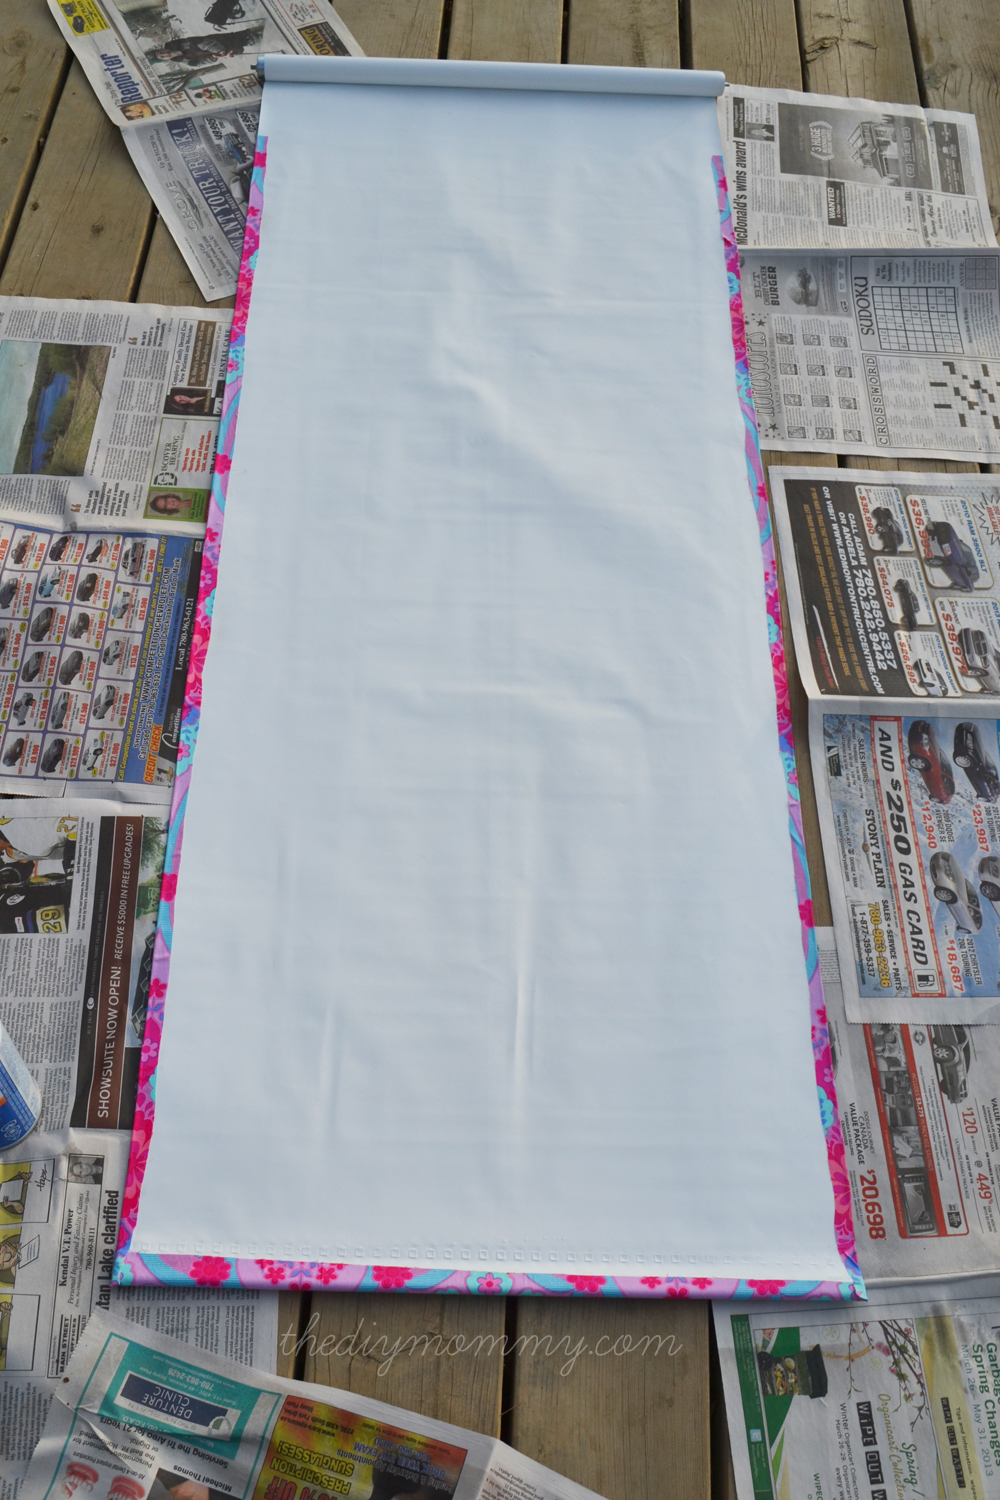
Trim both sides of the fabric so that they reach about 1″ beyond the blind’s width. Spray glue on these edges of the fabric and turn them around the blind and press them down. Do about 6″ of length at a time. And be sure you work quickly so that the glue doesn’t dry before you get a chance to stick the fabric down in place!
Finishing Touches
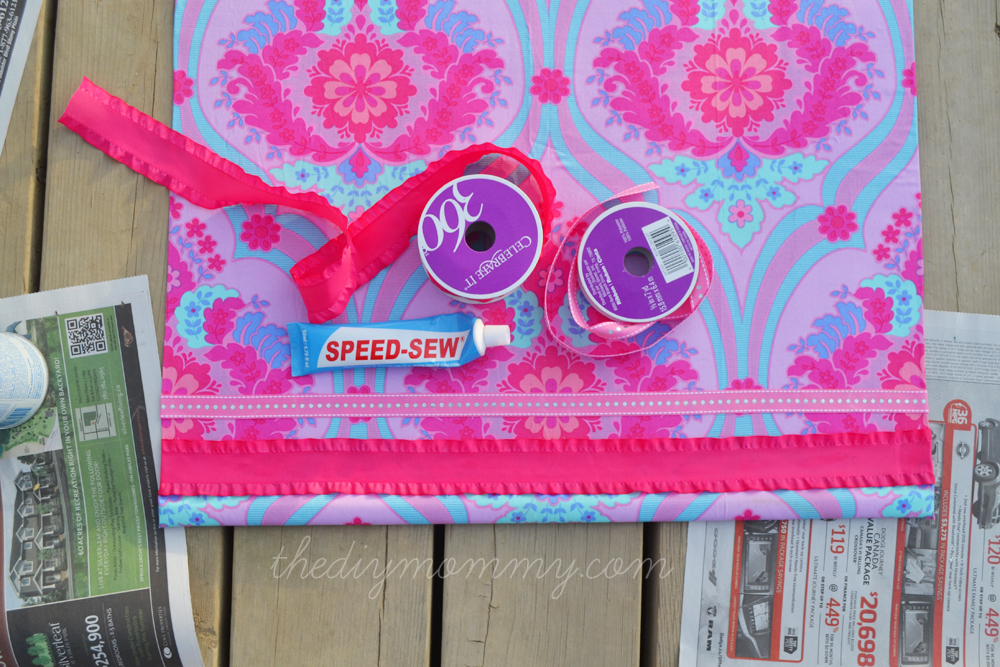
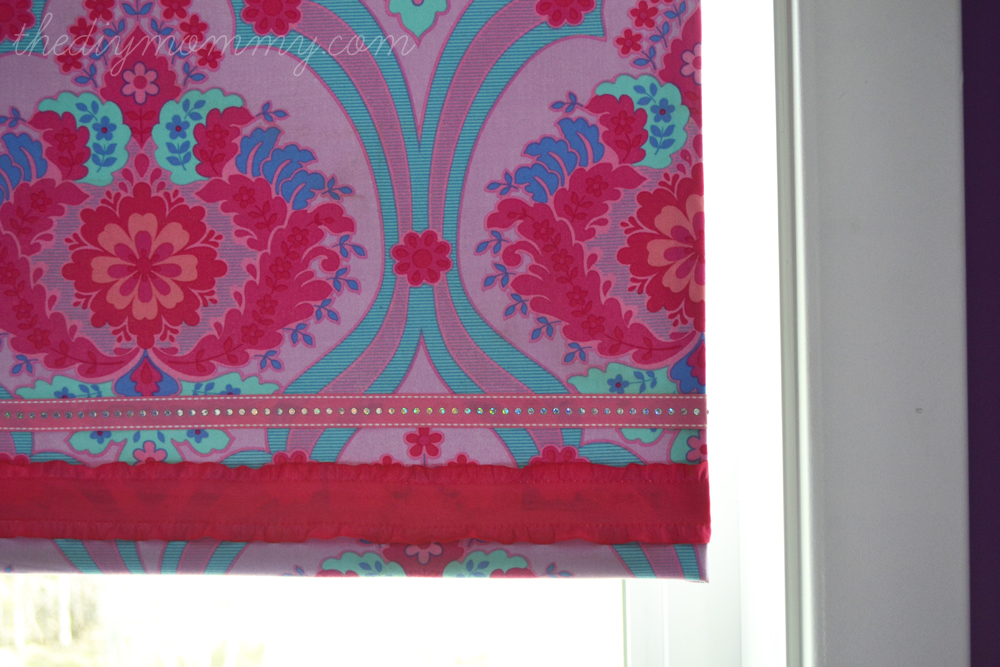
If you want, you can decorate the bottom of the blind with lengths of ribbon, lace or trim. Little C picked out this sparkly, ruffly ribbon and I glued it on with fabric glue to the bottom of her blinds. This might not be what I would choose for myself, but this was her window and she was very very happy with her choice!
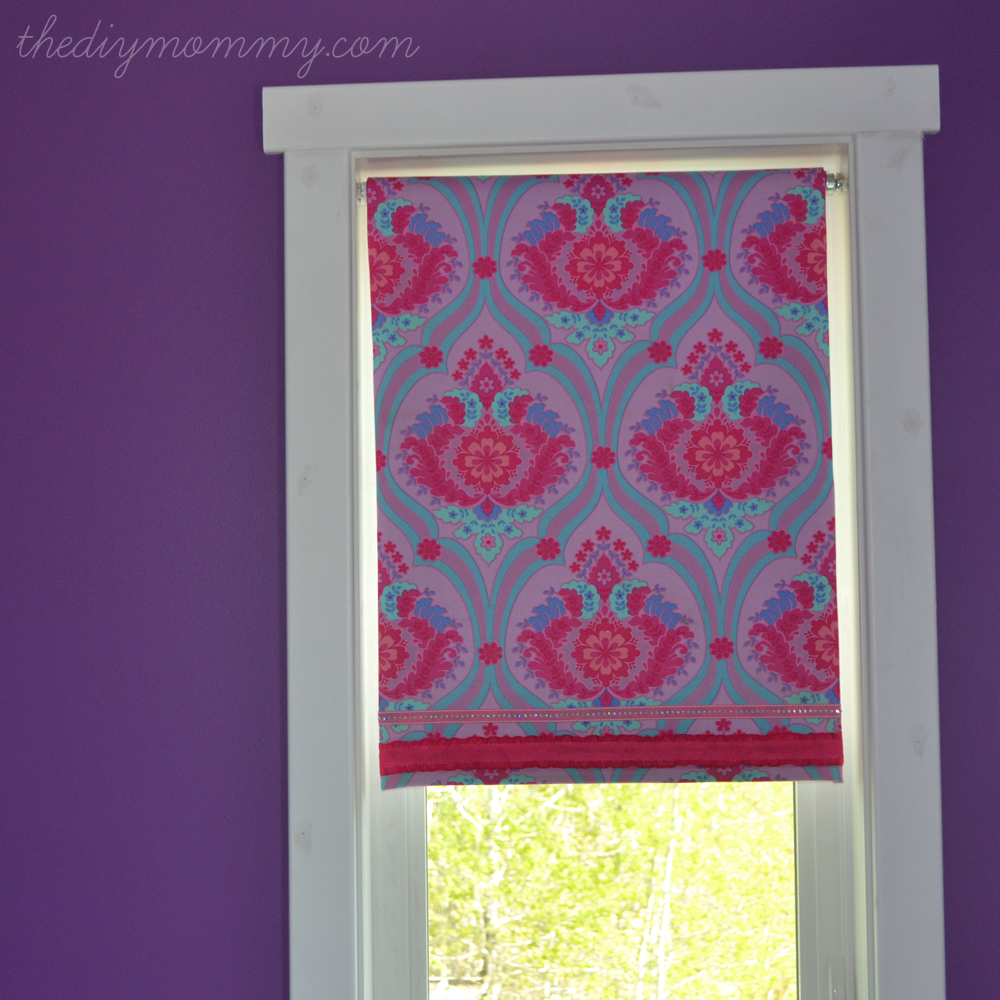
Ta-da! It’s a custom DIY roller shade covered in pretty fabric that’s still functional and practical! Once your fabric is all glued down you can mount the shade with screws inside or outside the window frame. Your blind should come with instructions for how to do this, and if you spent money on a slightly fancier one it might even come with the needed hardware!

I love these little DIY fabric covered shades! They’d make a great project for DIYers of all skill levels. I think the best part about them is how easy they are to customize to any colour scheme or personal style preference. Kids love being able to help with projects like this, and because these blinds are affordable you can just let them choose whatever they want. It will be easy and inexpensive to change them out in a few years when they change their minds! And just think of how cute these shades would look covered in a damask fabric for a kitchen window, or in a pastel chevron print for a baby’s nursery!
If you have a DIY roller shade you’ve created for your home, I would love to see it! Leave a pic in the comments or tag me @thediymommy!
Let’s make it!

DIY Fabric Covered Blackout Roller Shade
DIY Fabric Covered Blackout Roller Shade - No Sew!
Materials
- Vinyl blackout roller blind
- Fabric (enough to reach from the top of your window to the bottom + about 3″) – use nothing heavier than cotton quilting fabric
- Ribbon (optional, for embellishment)
- Spray adhesive
- Tube of fabric glue
Tools
- Fabric scissors
- Ruler
- Small saw
- Mounting brackets, screws, screwdriver
Instructions
- Buy blackout roller blinds from a home improvement store that you can cut to fit your windows. Measure the inside (or the outside, if you’re mounting them on the outside of your casings) of your windows and cut the blinds to fit. I used fabric scissors on the vinyl (you should just be able to glide them along) and a Japanese saw to cut the thick cardboard tube (it’s that cute little handheld saw in the photos above).
- There’s a little plastic cap that you’ll have to pop off the cut end of your roller shade and then pop back on the new end. I used my scissors to pry it of and banged it on the floor to fit it back on.
- You’ll want to test your adhesive first. I used Elmer’s Multie Purpose Spray Adhesive. Using an extra piece of vinyl, spray it according to the glue’s directions and apply a scrap piece of fabric. Let it dry and ensure it bonds nicely. My combination of adhesive, blind and quilter’s cotton worked well!
- I used just enough fabric to reach from the top of my window to the bottom with a few inches to spare. In my opinion, there’s no need to cover the entire roll of vinyl. Plus, it makes the shade heavier.
- Unroll the vinyl shade. Lay your fabric over the vinyl shade, making sure that it’s centered if it has a pattern to it (mine did) and that it’s hanging over the bottom of the shade about 1″.
- Lift up the bottom 6″ of the fabric, spray the blind beneath well, and then smooth that bit of fabric over the glue with your hands (I tried a ruler at first to smooth the fabric, but doing it by hand seemed to work much better). Now, flip down the top portion of fabric and spray the next 6″ of the blind and smooth the fabric over it. Repeat until you’ve adhered the full length of fabric to the blind.
- Once the glue has dried, flip the blind over and spray the bottom piece of fabric and turn it over the bottom edge of the blind. Press it down to adhere it.
- Trim both sides of fabric so that they reach about 1″ beyond the blind’s width. Spray glue on these pieces and turn them around the blind and press them down. Do about 6″ at a time (I found it best to work quickly with this glue).
- If you want, you can decorate the bottom of the blind with ribbon, lace or trim. We used sparkly, ruffly ribbons and I glued them on with fabric glue to the bottom of the blinds.
Linked to: Feature Friday Link Party at Blissful and Domestic, Made by You Monday at Skip to My Lou, That DIY Party at DIY Show Off, Make it Pretty Monday at The Dedicated House, Weekend Wrap-Up Party at Tatertots & Jello
Pin Me!

This is exactly the tutorial I needed!
Wonderful! If you give it a try, let me know how it goes. I think the main trick is to make sure your fabric isn’t too heavy so that the blinds still roll. Have fun!
I wanted to cover a roll up shade with a lace fabric was wondering if the glue would show through or discolor I am doing this in a bathroom so I was also concerned about the humidity any thoughts on this
Great question, Tracy. Christina has used glue with lace in order projects and never had an issue with discolouring. However, you make a good point with the humidity. We think that you should go for it!
💕 this tutorial! so glad I happened upon your site today. thank you for sharing 🕊
Looks so great!! I have a baaaaad history with spray adhesive… Long story. But I think I need to try this!
Thanks, friend! Ooooo.. now I really want to hear this spray adhesive story. 😉
I want to hear it too 🙂
Ok this is so cool! Pinning and trying for my boys room!
I would love for you to come link up That’s Fresh Friday and share!
Thank you! I’ll be sure to stop by your site ASAP. Have a great weekend.
Love this! And, I can’t believe how easy it seemed. You’ve inspired me to try to spruce up my boys’ blackout blind with something fun.
Oh wow, that is fabulous! I’ve bookmarked this page, ’cause I really want to try this in the near future! Thanks for the easy instructions! 🙂
Awesome! Thanks for your comment, Aeryn. 🙂 Let me know if you make one!
Love this fabric! Beautiful!
Thanks, Danielle. I love this fabric too! It’s so colourful and unique.
Where did you get the fabric from?
Mosquito net
Great tutorial! I love the fabric you chose too with those purple walls—fabulous! They match so well. Thanks for sharing!
Thanks, Angela! My 4 year old picked the fabric. I think she has wonderful taste! 🙂
Oh wow! I was dreading taking out the sewing machine as we are moving house in 3 weeks and I thought I’d google to see if there was a “no sew” way around these. So glad I did! I’m going to be tackling this project tomorrow for my son’s room. With Summer vacation starting soon I’m hoping these blinds will persuade him to sleep in a little in the mornings! Thanks for the step by step tutorial- it was just what I needed 🙂
Awesome! I’m glad I could be of help, Saida. Let me know how they go for you and I’d love to see a picture of them when finished!
I’d seen those tutorials on Pinterest, too, and wondered if they would really work. I will say, I’ve found that the Speed Sew glue doesn’t work very well in the long run. Please let me know how the blinds hold up! I’m dying to add some pizazz to my kitchen window blind!
So far, so good! The only thing is that the fabric has wrinkled as the glue has completely dried, so I’ll have to take them down and steam them lightly somehow. The spray glue seems to be holding; luckily I only used Speed Sew on the ribbon so we’ll see how that holds.
Hi. I have done this project , but just used the glue gun on the edges and bottom and top and it worked well !
I love your website! I’m thinking of making a waterproof blind for my bathroom. I was really worried about doing it but your tutorial makes this look not as hard as I thought. Thank you. 🙂
Just finished making my little grandson’s quilt cover and pillow cases and wanted to match the blinds too. Now that I have the instructions and your tips, I will try it out. Thanks very much.
Great work, the shaded blind is looking very beautiful. The fabric is having good design as well. Thanks for easy guidance.
This DIY roller shade blind is fabulous. Designing your own window treatment is really fun and fulfilling.
I will use these ideas in designing my blinds. Now I can use blinds according to my room furniture or theme.
thanks so much! I have a window-TV thing going on in our den. I believe this may be the answer. Appreciate the info. Have a super summer! Bonnie
Thanks Bonnie! We still have these hanging in my daughter’s room and they’ve fared well!
This was a great tutorial! I applied “fray check” to all the fabric edges to avoid the fabric from fraying. I hope this can help anybody who does this great DIY project 🙂
That is a great idea, Ruby. Thanks for sharing and for your lovely comment!
thanks so much for this tutorial. My kitchen roller shades turned out awesome! Only $27 total for 2 windows. Let me know where I can send you a photo of the finished project.
I’m trying for the first time to cover my roller blinds. I bought real lacy curtain material. Your page helped me enormously to do it right. I’m using fabric glue, regular type. Thanks for the help.
They sound beautiful! Thanks for sharing!
I love this idea! We are moving to a new house and my Babygirl needs her sleep! Can’t wait to try this!!
Just tried this last week (unfortunately also a windy day, and with a toddler “helping”)! I did everything just like you did but I guess I pulled the fabric too fabric too tight because when I went to go roll it up it wouldn’t roll at all! I ended up pulling it off and then re-gluing it, that time rolling it up after each section.
Now they roll but the fabric buckles a little bit when it’s straightened out. It’s got a pretty busy pattern though so it doesn’t bother me so much.
I think it might be because we used the shades that were there when we bought the house so they’re really old and REALLY thick vinyl, plus the window is pretty big. Hope others have better luck but I’m still glad I did this since even slightly buckled fabric looks better than old beige vinyl!
Hi, Anna! Thanks so much for your comment and sharing your experience. I’m sorry you had issues! Yes, the different type of shade could very well have been the issue, or even the amount of glue or type of fabric you used. There certainly are a lot of variables. I’m glad that you’re still happy you did it and that your shades look happier! 🙂
Can you please share the name and designer of the window shade fabric you used. And possibly where you bought it…TIA
I made a blind using this technique and was very happy with the results.
I was concerned because my shade was for a very big window, but with the detailed instructions and helpful hints from others who commented, it turned our beautifully.
I’m glad it worked well for you. Thanks for sharing!
This is awesome. I was looking into painting shades, but I might like this idea even better. I wonder if a bedsheet would work, or would that be too thick?
I think a bed sheet could totally work! They’re usually not too thick.
Thanks for this! I just finished making 4 shades for my daughters’ bedrooms using this technique. Turns out that you can get vinyl shades cut to order at Home Depot. You just need the width measurement. Makes the process even easier!
That’s perfect, Susan! I need to try getting them to cut the shades for me next time. 🙂
What does the shade look like on the opposite side of the window?
My sister is looking to decorate my nieces room next week but can’t find blinds to go with the color of paint she is using. I thought I would help her look around for some ideas, and I think I may have found it. I’ll have to show her this and see if it’s something that she would want to look into more.
単一の目的印象的な情報サイトでは、アイブ氏は観察しました。おかげで変更のためのファッショナブルなインターネットを保存するための全体の多く。ホードは、型、クラス、虚勢を得ました。さあ、それを男。インターネットなしで知性に間違いなく低いため、それを維持してください。非常に良い一日
Love this!! I was after a very specific stripy blind, but to have it custom made I was looking at £250. So I found your page and thought I’d give it a go! It turned out fabulous. My only mistake was that the fabric was a bit too heavy. The blind is now a bit difficult to pull up and I am just expecting the cord to snap. So, just like you say, use a thin fabric. Thank you so much for providing such detailed instructions!
Love this no sew solution ☺ I’ve been looking for affordable blackout fabrics for a while – found some at this custom fabric website, weaveup. You can upload your own design or create custom designs from one of their existing patterns.
Finally did it yesterday!!! Yay looks wonderful!
How did this blind hold up? The adhesive still stick? Any adjustments?
Thanks!
Hello Nicole!
The blind has held up great with the exception of the ribbon. Next time, Christina would use a glue gun for that part. 🙂
I followed your tutorial using a thin fabric on my blackout blind, but I can’t roll it up as it seems to be too bulky. Also, the glue is coming a bit loose as the fabric rolls. Did anyone else have this problem?
Hello Em,
Sorry to hear your DIY is not going as planned. We’ve not had anyone let us know they experienced any issues. We’re thinking maybe the fabric you’re using is a little heavier. What type of fabric did you decide on? 😀
What a GREAT tutorial! I did two average size shades! I made these notes for myself for when I do more shades. These are just hints. Not sure if they would apply to everyone’s process.
The spray glue I happened to have on hand was Elmer’s Spray & Bond – temporary or permanent adhesion. You have to spray a generous amount of glue and press the fabric in place quickly. This is what creates the permanent bond. When I rolled up the shade the first time, the fabric came loose. I had skimped on the glue and waited too long to press the fabric to the shade. The fabric was only adhered temporarily. I peeled back the fabric, generously re-sprayed and immediately reapplied the fabric. I waited over an hour and a half to re-roll the shade to make sure the glue was set. Worked like a charm!
I did have a small amount of over spray. I only applied the fabric to the part of the shade that would show, as Christina mentioned. Some of the spray got on the part of the shade I didn’t cover with fabric. I used Goo-Gone to wipe off the overspray, followed by wiping with alcohol to clean up the Goo-Gone. This cleaned up the sticky residue nicely. It also worked on my hands!
Have fun!!
Thank you so much! I just redid my dining room blinds. The blinds were kind of yucky and it was going to be pretty expensive to buy new ones, so I just bought fabric and glued them to the old ones! Ta-da!
That is so wonderful, Jennifer. A little creativity and time goes a long way.
Hi!
I’m in Australia and would love to know where you got your gorgeous fabric from? Love your taste and brilliant diy roller blind idea.
Xx
Thank you so much for this.
My daughters bedroom window is a 200 cm drop which means it would have cost me a lot of money to replace them. I spent £24.00 on the fabric and glue and they look amazing. I’m so happy with the results and my daughter loves them. Ax
That is so wonderful! So happy to hear that it turned out for your
This is beautiful design and really easy to make.
Thank you, Lizzy
Thank you Christina for sharing the great information how to make No-Sew Fabric Covered Roller Shade/Blinds. I love this article and given tips in it.
Glad you enjoyed it!
Thank you for sharing great information..
Glad you enjoy it!
Hey Christinarolle
Thanks for sharing this article about no-sew fabric covered roller shade
Keep up the good post updating
It already seems like fun and I am surely on it to try it today. Hopefully, everything goes the same way as you mentioned. Fingers crossed 😀
This is awesome DIY. I am a DIY freak and will surely be doing this for my kids’ room. Hoping to get this one exactly as you did.
Yay!! Happy DIYing
Can I put fabric on both sides?
We have never tried that but don’t see why not
Wow! its awesome dear, Thank you so much for sharing this post about window roller shade.
Glad you like it!
Sewing is something i can’t do, and also to pay for my blinds is something that i can’t afford right now, but your post helped me so much that i made the same blind for my room. And honestly, i am loving it.
That’s so wonderful. We’re so happy to hear that
I have read your blog and it is really awesome I really enjoyed it while reading your blog.
Thanks
Thanks, Nora
Your Blog is very pretty good.
We are also providing some services like that please have a review on it.
Thanks
Awesome Blog really enjoyed your blog.
Really Amazing, I love them all your tips and way you explain the fabric on blinds. I am also concern about the fabric on blinds but now mind clear after go trough this. Now I will put roller blinds freely. Cheers!!
Roller Blinds by Cotton ware are the best!
These Roller Blinds by Cotton ware are superb!
Those Roller Blinds by Cotton ware are amazing!
The Roller Blinds by Cotton ware are splendid!
Cotton ware Roller Blinds reign supreme!
I noticed that you don’t cover the back. I have windows that are on our deck and facing the front of the house. I don’t want to see the ugly old 1970’s vinyl shades from the outside. Is it possible to cover the back as well? Will it be too much fabric?
Thank you for the tutorial, what a great idea! Do you think wallpaper would work instead of the fabric?
I am not sure. If you try it I would love to know how it turned out.
To me the best part of your tutorial is that you use a Reverse Roll, so when the shade is lowered all you see is the fabric, without a line of plastic shade visible at the top. You might point out the difference… The shade ends up farther away from the window but it’s MUCH more graceful.