Make a Laundry Room Countertop from an Old Door
This post may contain affiliate links · This blog generates income via ads
With a really limited budget for our laundry room finishing, we had to come up with a creative solution for the counter top that would go over our washer and dryer. I knew I wanted something solid over the machines that I could fold clothes or store laundry baskets on, but it had to be something inexpensive… or free. I thought about a good solution for a while. I finally had decided upon staining some plywood and cutting it to fit over our machines until it hit me one night. What’s flat, 30″ deep and free? AN OOPSIE DOOR. I had just thought of another use for the little stack of doors we have in storage that were wrongly ordered when we built Our DIY House! Why not?!

A door over the machines was exactly the right depth I wanted, and I really love the character it gives the room. And free is the right price.

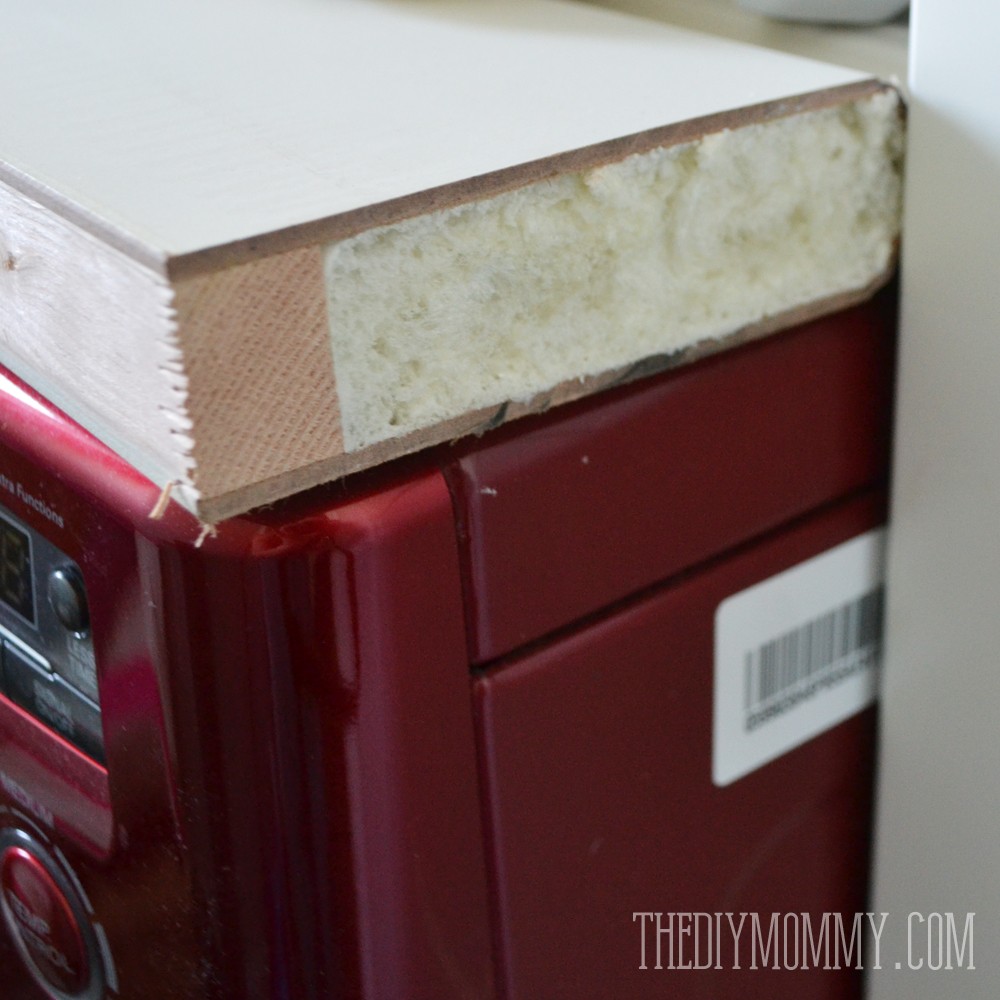
We (and by “we” I mean my Hubby) had to cut down the door’s height to fit over the washer and dryer, so we trimmed both ends with a table saw. Since it’s a hollow core door, my husband glued pieces of scrap wood inside both cut edges to strengthen the door so it wouldn’t buckle.

Then, we filled the exposed holes with spray foam.
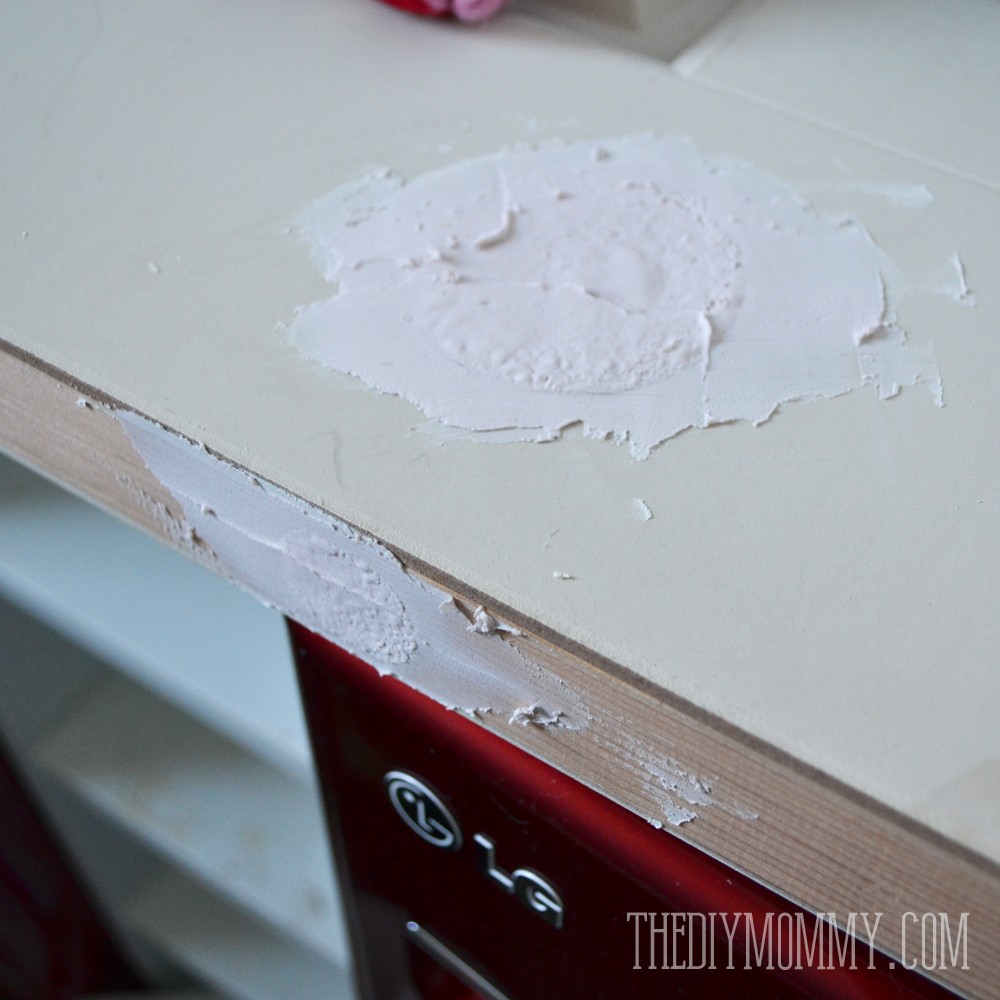
Once that set, I smoothed some spackle over the foam and sanded it smooth when it was dry.
Then, I got to paint yet another door! I wanted a sort of barn wood faux finish.

Like our advent calendar door, I started out with a solid coat of Annie Sloan Chalk Paint in French Linen. Then I dry brushed the door with a cool dark brown paint (I used French Vanilla by Martha Stewart acrylic paint). Finally, I waxed the entire thing with Annie Sloan Dark Wax.

My husband installed some brackets behind the machines for the door to rest on. We wanted it floating above the washer and dryer so that it could be easily removed if ever we wanted to access the plumbing behind.

The door rests on the brackets and floats nicely over the machines. There was a funny narrow shelf that was installed wrong to the right of the washer, so we moved that in between the machines.

I’m loving the finish on the door! It’s different and rustic-y vintage-y looking and something I haven’t seen before. It brings some texture into the space.

Here’s a sneak peek at the rest of the space so far! I’ve hung an antique washboard up as well as a hand painted laundry sign I made from a scrap piece of MDF I was practicing paint finishes on. I love it!

I made the sign exactly how I made this sign, but I painted and dry brushed MDF instead of stained wood.
I can’t wait to share the rest of the room with you soon. I hope to have it done within the next week or two. I’m enjoying referencing the mood board that I made as we plod along to finish this space.
Have a great week!
The room is looking awesome! Good job with the oopsie door. When I’ve cut down hollow core doors before, I’ve found I’m sometimes able to take the off cut, peel the outer surface off (a chisel usually helps) and slide the solid wood piece back into the gap in the door. I’m not sure if this makes any sense, or if would work the same with a paneled door like yours (I’ve done it with mostly slabs before).
Thanks so much, Julia! That’s a fantastic idea. We had to do a custom piece because we had to make the cuts in the middle of sunken panels, but your solution would work so well otherwise!
Way to be thrifty! Free is definitely the right price, and I love how unique it is to have a door acting as a countertop. Clever! Your paint job turned out awesome, too (as always)!
Thanks, Sara! I’m loving the paint job, and I am also loving $0 things these days. 😉
This is genius! I love how things pop into your head when you are pondering on a decorating problem. I love having a counter top over the washing machine. So much more likely to get the laundry folded and put away when it is so handy. I am curious about how you hung your antique wash board. I have one too (mine has a glass panel for scrubbing on) and and not sure how to fix it to the wall.
Thanks so much, Jules! I LOVE when ideas come so randomly too. I hung mine with a Command Photo Hanging Strip. So far, so good!
What a unique way to create a counter in your laundry room! I am sharing this over on my facebook page tomorrow, and pinning it!
Thanks so much for sharing Melanie!
Beautiful job!! Love everything you did. Would love to know the paint color you used on the walls.
What a fabulous idea. I have been wanting to try something like this but I couldn’t figure out what to do. Now with this post I have it.
I love your door countertop! So creative and I happen to have a couple of antique doors that I was trying to find a creative use for! I’m not great with construction though, and I’m having trouble understanding how your door is supported by those short little brackets on the wall. Could you give me a more detailed explanation? Thanks!
Wow great job, its beautiful! I was wondering what paint colour you used?
The color of the door? She started out with a solid coat of Annie Sloan Chalk Paint in French Linen. Then she dry brushed the door with a cool dark brown paint (She used French Vanilla by Martha Stewart acrylic paint). Finally, she waxed the entire thing with Annie Sloan Dark Wax.